Home Assistant doesn’t come out of the box with any themes, which is a shame – but there are loads available from the community.
In this part of the guide we are going to use the manual process of editing the frontend.yaml file to add a selection of themes, but later will show you how to enable HACS the Home Assistant Community Store. Although it is called a store there is no charge for adding any of the integrations, plugins or themes.
Home Assistant has a built in File editor (aka Configurator) which allows you to manually change any of the YAML files affecting the operation of Home Assistant. Most of these sections are configurable through the core Configuration panel, but some are still being migrated.
Accessing the File Editor is easy:
![]() Supervisor -> File editor -> Open Web UI
Supervisor -> File editor -> Open Web UI
You can also enable the ‘Show in Sidebar’ option which will give you a direct link to the Web UI of the Configurator. Especially useful at the beginning as you’ll often flick back and forth between that and the Server Controls in Configuration to restart the system and enable the changes. This is why using the built-in Configuration panel is preferred as it allows for many automatic changes without restarting.
Unfortunately, frontend theme configuration is still done directly through the YAML files (or HACS), but will use this opportunity to demonstrate how to use the File editor.
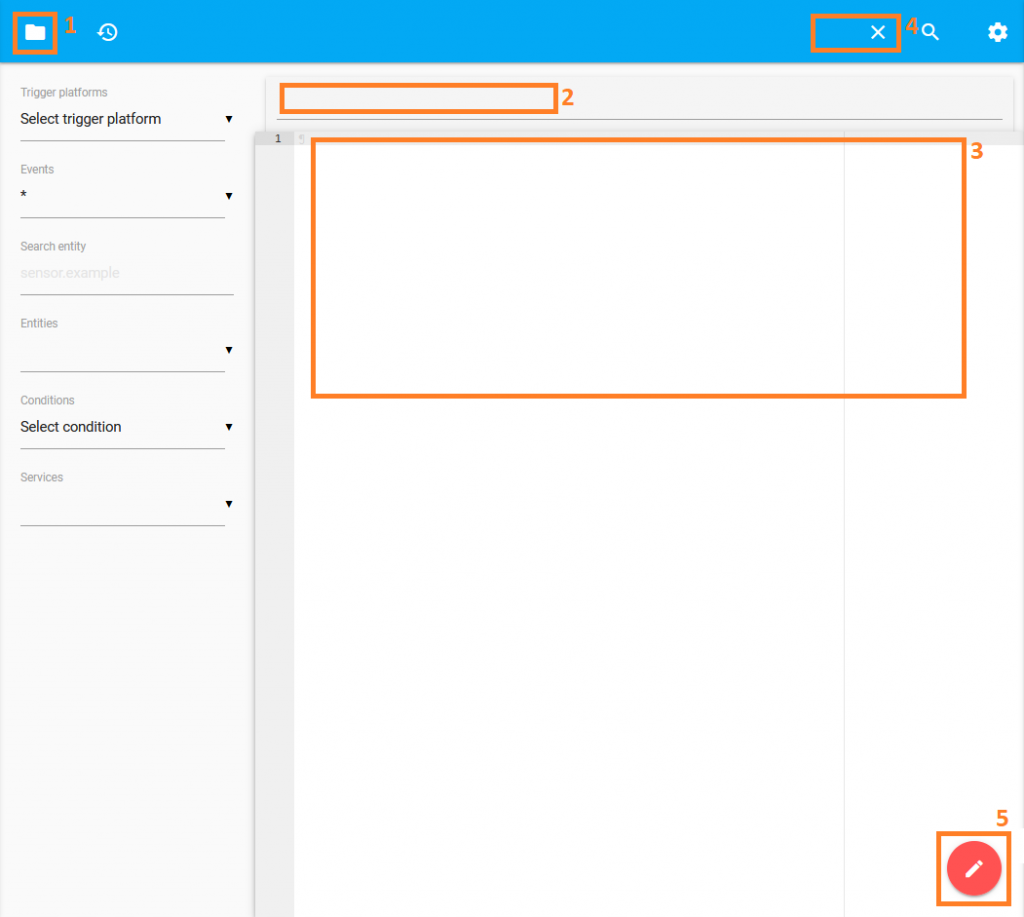
The above screen shot of the File editor shows the core sections:
- File selector
- File name being edited
- File contents
- Save and close file
- New file
For this setup we are going to add some themes, so by using the file selector (1) you can choose ‘configuration.yaml’ which is the main configuration file.
We are going to add an include statement that allows us to offload the frontend configuration into another file so that the main file doesn’t get difficult to read.
frontend: !include frontend.yaml
Adding this to the ‘configuration.yaml’ file tells Home Assistant to look for and use a file called ‘frontend.yaml’
Therefore, after saving (4) and then using the new file (5) option you can create a ‘frontend.yaml’ file and add the themes into it (3).
Obviously you can write your own theme and there is some detail about how in Home Assistant documentation, but another option is to use someone elses frontend.yaml.
Due to manually editing the ‘frontend.yaml’ you’ll need to restart Home Assistant for it to re-read the configuration files.
![]() Configuration ->
Configuration -> ![]() Server Controls -> Server management -> Restart
Server Controls -> Server management -> Restart
Then select via the user profile what theme you want to use or get Home Assistant to set it for you depending on a sensor value, such as the Sun…
Next: Step 5: Sun & Moon via Footstep 2: Config